Back Outside[]
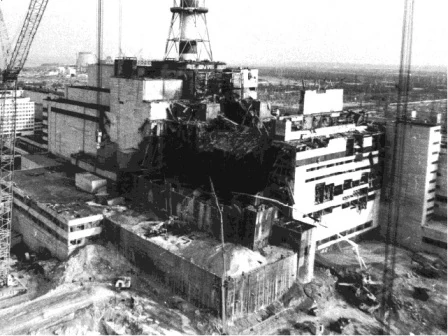
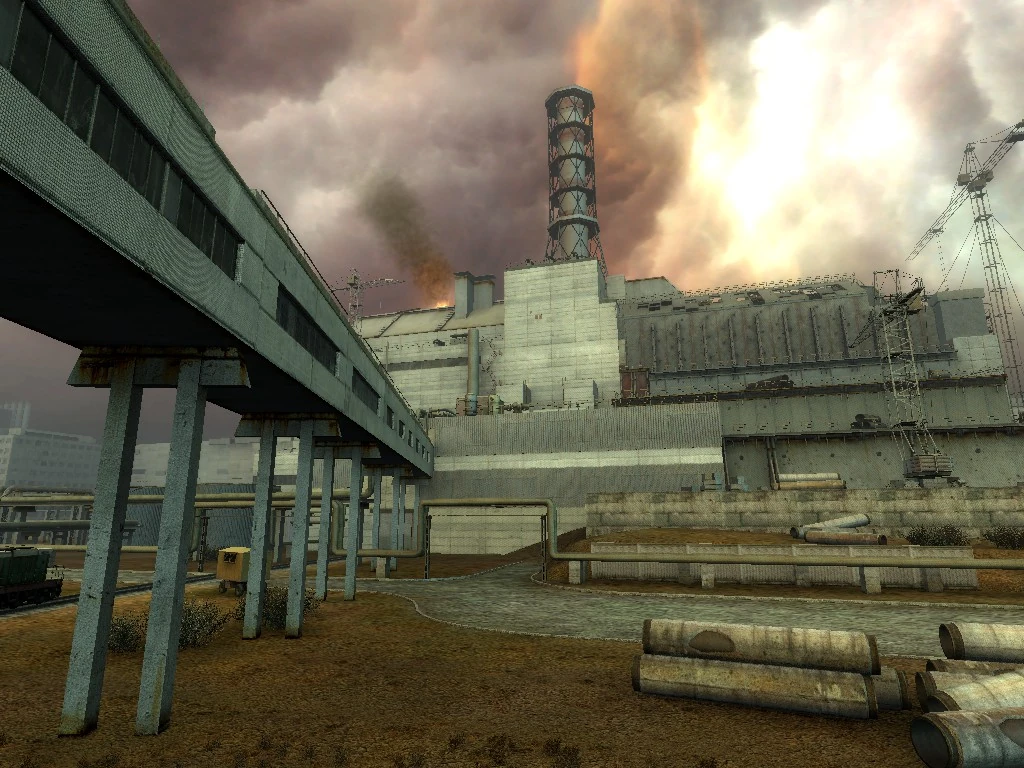
Area 1[]
You're back outside in the Chernobyl area. Your mission is basically to escape but to do so you'll need to head into a number of teleporters that will take you around the map. There are about 15 in total and you'll be facing opposition in most of the areas; however, if you are still wearing the Exoskeleton armor and you're packing a decent rifle, it shouldn't be too tough - you'll also find both fresh weapons and armor along the way in case you need it.
On the right side you can find a map that shows all the different areas and teleporters. You'll be starting at the first area (area 1) and the teleporter there, designated T2, will take you to area 2. In the text below I'll sometimes refer to these areas (and provide some screenshots) so you hopefully won't get lost.
A lot of the areas, especially on ground level, are heavily irradiated so once you move up on building try to not fall down - it may be very difficult to get back up and you're likely to die from radiation. Every now and then you'll hear a rumbling noise and the screen will start to shake. If you're not directly in a firefight at these times, just wait until the shaking has stopped since it can make aiming quite difficult.


Transport Network and Conflict Areas outside CNPP
Move ahead and you should be able to see a glowing orb (or somesuch) up ahead, slightly to the right - that's a teleporter and you'll need to head through a number of these to escape. With many of these, and the areas in general, Monolith soldiers will often be teleported into the area near or around you. When you approach the first teleporter, three soldiers will be joining you so watch out.
(There is a second area 1 teleporter further on past the first campfire; this transports you directly up to the first level of area 2 behind the pipes, bypassing the ladder)
Area 2[]
After entering the first teleporter you'll find yourself on the ground with a ladder just ahead; move up but be cautious - there'll be a Gauss sniper and a soldier with an RPG directly in front of you, on a slightly elevated area. Usually - at least that's what happens to me all the times - the RPG guy will blow himself up, possibly because he hits the railing straight in front of him, but the Gauss sniper will have a clear shot. Move behind the large pipes and use them as cover. There are also soldiers on your right side, where you'll also find another ladder going up - see if you can deal with both the sniper and the soldiers before you climb it. There is another Gauss sniper close by so once again use the pipes for cover and take him out. Another ladder will be going up so climb it once you've dealt with the sniper and most (if not all) the soldiers on the next platform. Move to the east and you'll find a ladder going down; head that way and down the next ladder as well. You'll end up on the elevated area with the RPG soldier. There are some crates here - be sure to break since I was able to find a fresh Vintar BC in one of them. You can find another ladder close by going up to a small roof where the first Gauss sniper is. Move further to the east and you should be able to find yet another ladder going down to a somewhat narrow walkway. Proceed north and you'll soon come upon more soldiers ahead of you - dispose of them and head on. If you look west you should see a large "crane" and a large building behind it; on the roof you may be able to spot a number of soldiers including two Gauss snipers. Deal with them if you can because you'll be heading onto the roof. Following the walkway you should soon spot another teleport to the west. Proceed forward into it. As you get close a soldier will be teleported in front of you, along with about 6 more on the roof ahead - these include a soldier with an RPG so stay in cover as you proceed and deal with especially him before you move into the teleporter.
Area 3[]
When you enter the teleporter you'll start falling and then head into another teleporter - which will lead you onto a small building on the roof. Deal with any remaining soldiers and move towards the next teleporter located at the south-western part of the roof. You'll find some crates and a metal box nearby so be sure to search them if you are in need of supplies - I personally didn't find anything really useful though.
Area 4[]
Entering the teleporter you'll find yourself on another roof directly in front of a ladder - climb it and you can now get a very close look at the chimney/exhaust/thingy of Chernobyl. You are on a very narrow walkway - refer to the screenshot for the location. To the north, on lower ground, there are more soldiers, including one with an RPG so be sure to deal with him. Move forward and down the slanted roof and up the ladder. You'll find yourself on another roof directly next to the exhaust thingy. There are two more soldiers up here, so take them down and move into the next teleporter to the south-east. You'll fall into another teleporter and find yourself on some vents with a ladder ahead of you.
Area 5[]
Move up the ladder - of all things there is a Snork up here. Deal with it (a grenade thrown from the vents works well) and move into the next teleporter which will take you to another narrow walkway.
Area 6[]
There is an RPG soldier up ahead so pray he hasn't spotted you - it can be a tough spot if he has, because if he manages to fire his weapon there's a good chance you'll die no matter what armor you're wearing. Once you've taken him down move ahead into the next teleporter straight ahead.
Area 7[]
You're on another roof that has two Snorks on it. Proceed forward and you should soon spot a place where the railing is broken. Move towards it and when you get close enough you should spot a teleporter in the air just below. Jump into it.
Area 8[]
You'll find yourself on another narrow walkway with yet another RPG soldier ahead. Rinse and repeat. There are more soldiers towards the west, on a walkway closer to the ground - one of them carries an RPG so deal with them before you head into the next teleporter.
Area 9[]
You're now on another walkway with pipes on both sides - refer to the screenshot for the location. The walkway is broken up ahead and you need to get onto the other side of it. To your left there is a roof with some soldiers on it so deal with them if you can. Ahead you should see a ladder on a building close by to the south - you'll need to get there, so jump onto the reddish pipe and onto the ladder or roof. On the western side you should find a very thin railing (or fence) - move onto that and jump onto the next roof to the south. Proceed east and jump down to the next part to the north. You should see a ladder going down and behind it the second part of the walkway that you initially started on. Move up to the ledge and jump onto the walkway. Proceed east where you should now be able to see the next teleporter.
Area 10[]
Head into it and you'll find yourself on the structure you've just passed under. There are two soldiers up here, but you may have dealt with them from the prior walkway. Head north and into the teleporter next to the tall chimney.
Area 11[]
You'll find yourself on another narrow walkway with the next teleporter just up ahead. No opposition this time.
Area 12[]
You'll come to yet another roof with soldiers on it; you may see one directly ahead of you that quite possibly hasn't spotted you yet. Simply follow the roof, and deal with any soldiers along the way; you'll soon come to the next teleporter.
Area 13[]
More roof, but this one has a number of camouflage nets on it, along with some crates and metal boxes in the middle, along with a fresh Military Armoured Suit. You may very likely wish to replace your current armour with this one. Loot all the crates and boxes - many of them contain medkits, ammo, bandages, and you may even find a fresh FT 200M. Proceed east and you'll encounter two more soldiers with another teleporter behind them.
Once you head into it you'll very shortly be brought back to Sidorovich who makes an appropriate comment, you'll soon after return to another roof near Chernobyl.
Area 14[]
You can just barely see the next exit teleporter from here, on an elevated area - but you'll need to head around the structure to find some stairs going up. There are more soldiers about so deal with them as you move along.
Area 15[]
The next area is ("Huzzah!", I hear you shout) the final area, but it's also the largest. You'll need to make your way to the south but there will be soldiers in the vicinity, as well as a Gauss sniper further to the south on an elevated area. Directly east of the starting point you'll find some stairs going up - you need to head up there to work your way to the south. Directly up the stairs, next to a container, you can find an Exoskeleton armor - take it if you really need a new armour, otherwise just ignore and move south (you need to go south, west and then south again crossing a number of smaller buildings/structures). As you proceed more soldiers will be teleported in, both in front of and behind you (including two Gauss snipers and an RPG soldier). Eventually the elevated walkway will end - but there should be another structure just ahead that you can jump onto. You should now be able to make out the last teleporter in front of you, on another elevated area - there is a ladder heading up. Careful, when you get close to the teleporter, though, since more soldiers will be teleported in around you - you may wish to back up and drop down to the area you just came from, and take them down from there - or you can possibly try to sprint towards the teleporter and see if you can make it without having to fight.
When you eventually head into the teleporter, you'll be treated to a nice cutscene. Congratulations, you've completed the game and explored the "best" ending!
Back Outside II - Alternative Routes[]
The Local Environment[]
- As noted earlier, the grounds of the CNPP are quite inimical to the player because of their irradiated status, but it's more complicated than that. If the player runs the gauntlet in a half decent suit then small 'health hits' are the first damage taken which stop you running, needing frequent taps on the runkey to progress. Not very long after this, radiation starts leaking through and your health takes larger hits and at some stage you need to boost health and deal with the radiation poisoning.
- Added to this, your suit isn't looking so new and shiny either. As it degrades you take on radiation at a faster and faster rate which degrades it (and you) faster too.
- Fortunately, this attrition ceases immediately that you get off the ground and let your suit 'cool off'. Clearly the best strategy would revolve around short runs through the crappy environment followed by short rests off the ground.
- "Off the ground" might be pretty much anything, a ladder, a box, a tall brick, some pipes or even a crane leg or a railway buffer. Naturally, not many of these useful items will be found in convenient places.
Opposition[]
- When you total the Monolith forces on or adjacent to the 15 Areas above you will have 70+ opponents. About 15 are in Monolith suits on areas 2 and 3, 10 Gauss snipers pepper the whole region; 8 RPG men are on stakeout too; all others (40ish) are GP37 toting Exoskeletons. Three snorks are waiting too (there are more on another rooftop near area 14 for the adventurous)
- The orthodox route takes you through all the areas and the lines of fire of the snipers (but they may not all notice you) You decide who you take on or run from.
- It takes 2-3 zone hours to get to the exit teleport on Area 15.

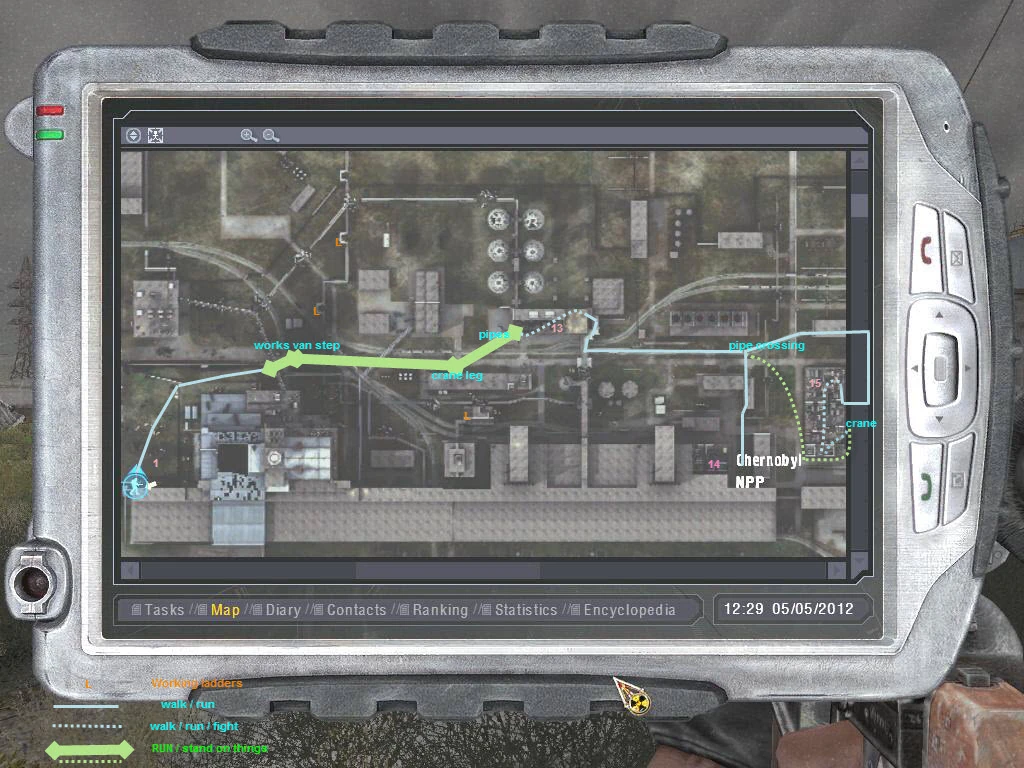
CNPP 'Run for it' Routeplan
Route 1[]
- Basically, run away from opponents across the grounds to Area 13.
- Your target is the ladder leading up to 13.
- Running in a rough arc through Area 1, past the teleports and behind the Sarcophagus is pretty straightforward and the ground gets 'hot' just before the walkway between Areas 2 and 3.
- There are off-ground refuges by a works van, a crane and some pipes (see map detail)
- By entering 13 up the ladder, only the two exos guarding the part nearest the exit teleport will be present. You may loot the vicinity by the SKAT suit without harassment and then progress.
- Instead of taking the exit teleport to 14, walk around it and take two down-ladders and a pipe to the broad concourse that doglegs south.
- Partway along here take an aerial pipewalk due east past Area 14 to the complex junction with other pipework running south-north from around 14.
- Negotiating a jump over/through this junction is tricky - but not impossible and allows you to link up with an elevated pipewalk detailed here (many thanks to GRPeng for the info here)
- You then pipewalk around to the side entrance to Area 15 and play the final area as normal to the exit teleport.
- Total time, about 50 zone minutes.
Route 2[]
- The same as Route 1 up to the pipe crossing.
- In the event that you screw up your jump (or just jump off) at the pipe crossing, although there are no handy ladders or nearby off ground refuges, you are not implicitly doomed.
- Follow the dotted lime path behind the last teleport on 15 and jump onto a crane leg around the corner.
- Climb or jump/climb up the crane stanchion to the small rusty platform up above, from there use a bit of the bracing to jump onto the railing around Area 15.
- Head LEFT (south) along the railing and wall, trying not to fall, and enter 15 in the last third of the area.
- Initially, there will be no opposition as a result of this flanking action but the first opponent to appear will be the RPG man covering the final ladder. You have time to sprint to that ladder and then run to the GO teleport before he gets into position, but if you stop to take on the six final exos he will notice you and in all likelihood eliminate you. You may of course, crouch at the ladder base and snipe him, taking your overall body count to three.
- Total time, under 50 minutes.
Route 3[]
- The same as Route 1 up to Area 13.
- Then teleport as normal to 14 and follow GRPeng's pipewalk plan as detailed here.
- In the event that you screw up your jump (or just fall off) again, you are now in an even better location to try for the crane mentioned in Route 2.
- (The safe-looking ladder on the nearby building is unusable, even for off-ground refuge purposes)
- A downside of either Route 2 or 3 is that sneaking onto 15 from the pipewalk gives some exos time to get up onto the gantry walkway ahead of you. More of an inconvenience really.
- Total time: about 1 zone hour.
Other Routes[]
- Well certainly, but you will be hard pressed to find a faster route than Route 2 with the crane variation.
- Considering all the to-ing and fro-ing on the teleport map, you might think that you could jump over the railing from Area 4 down to Area 12. You can not. Trying to walk around the Sarcophagus roof also fails in this respect (but you can fall into the Sarcophagus and die)
- Nice to know that some ladders DO work just in case you mess jumps up:
- Obviously the two ladders at Area 9. But there's another ladder up to this building complex around the side which is invaluable if you miss the exit teleport at Area 7.
- Several ladders not far from Areas 6 and 8 which allow you to get back onto the pipenetwork. Not unguarded either, and your walk will end at a teleport that drops you onto Area 3 in all probability.
Gallery[]
")
")
")